If you are like me, I have a surplus of scraps, and when Swan (Visit her scrap projects here) asked for guest designers to help with her Summer Scrap Elimination 2022, I knew I could help with a project. Once I decided on a project, I kinda went crazy making them. Not only do I have this pattern I am sharing with you today, but I will have other patterns I will be sharing over the next month that will help bust that stash of scraps.
 |
| My scrappy pillow |
This is a great project to use left-over pieces from a quilt to make a great matching accent pillow for a bed or couch. This is also a great way to use up the 2 1/2" packs (Mini Charms from Moda).
What you will need:
*(32) 2 1/2" squares
*(2) 2 1/2" x 16 1/2" rectangles - border
*(2) 12 1/2" x 10 1/2" rectangles - backing
*Thread to match the backing fabric
*12" x 16" pillow form
Sewing:
Step 1:
There are two different layouts you can
make with the (32) 2 1/2" squares. Please pick the layout of your
choice from the following diagrams.
 |
| Layout #1 |
 |
| Layout #2 |
For my pillow, I choose Layout #2
Step 2:
Sew the squares together into rows, following the diagram that
you choose. Press seams following the arrows in the layout diagrams
above.
Step 3:
Sew the two center rows together, matching the seams.
Press to one side.
 |
| Pillow Center |
Step 4:Next, add a 2 1/2" x 16 1/2" border strip to the top
and bottom of the pillow center. Press toward the border strips.
 |
| Pillow center with borders added |
Step 5:
Now, sew the top and bottom rows to the
pillow center. Press toward border strips. Once you have your
pillow front this far, lay it to the side while you prepare the backing pieces.
 |
| Add top and bottom rows. |
 |
| Press toward border strips. |
Preparing Backing:I love using the Hot Ruler from Clover. You can purchase this Hot Ruler HERE. You can press on this Hot Ruler, so making the hem on the backing pieces is sooo easy! This ruler is 2 1/2" wide x 10" long.  |
| Hot Ruler by Clover |
Step 1:Place
your backing wrong side up on your ironing board. Then, place the Hot
Ruler, ruler side up, along the 12 1/2" side.
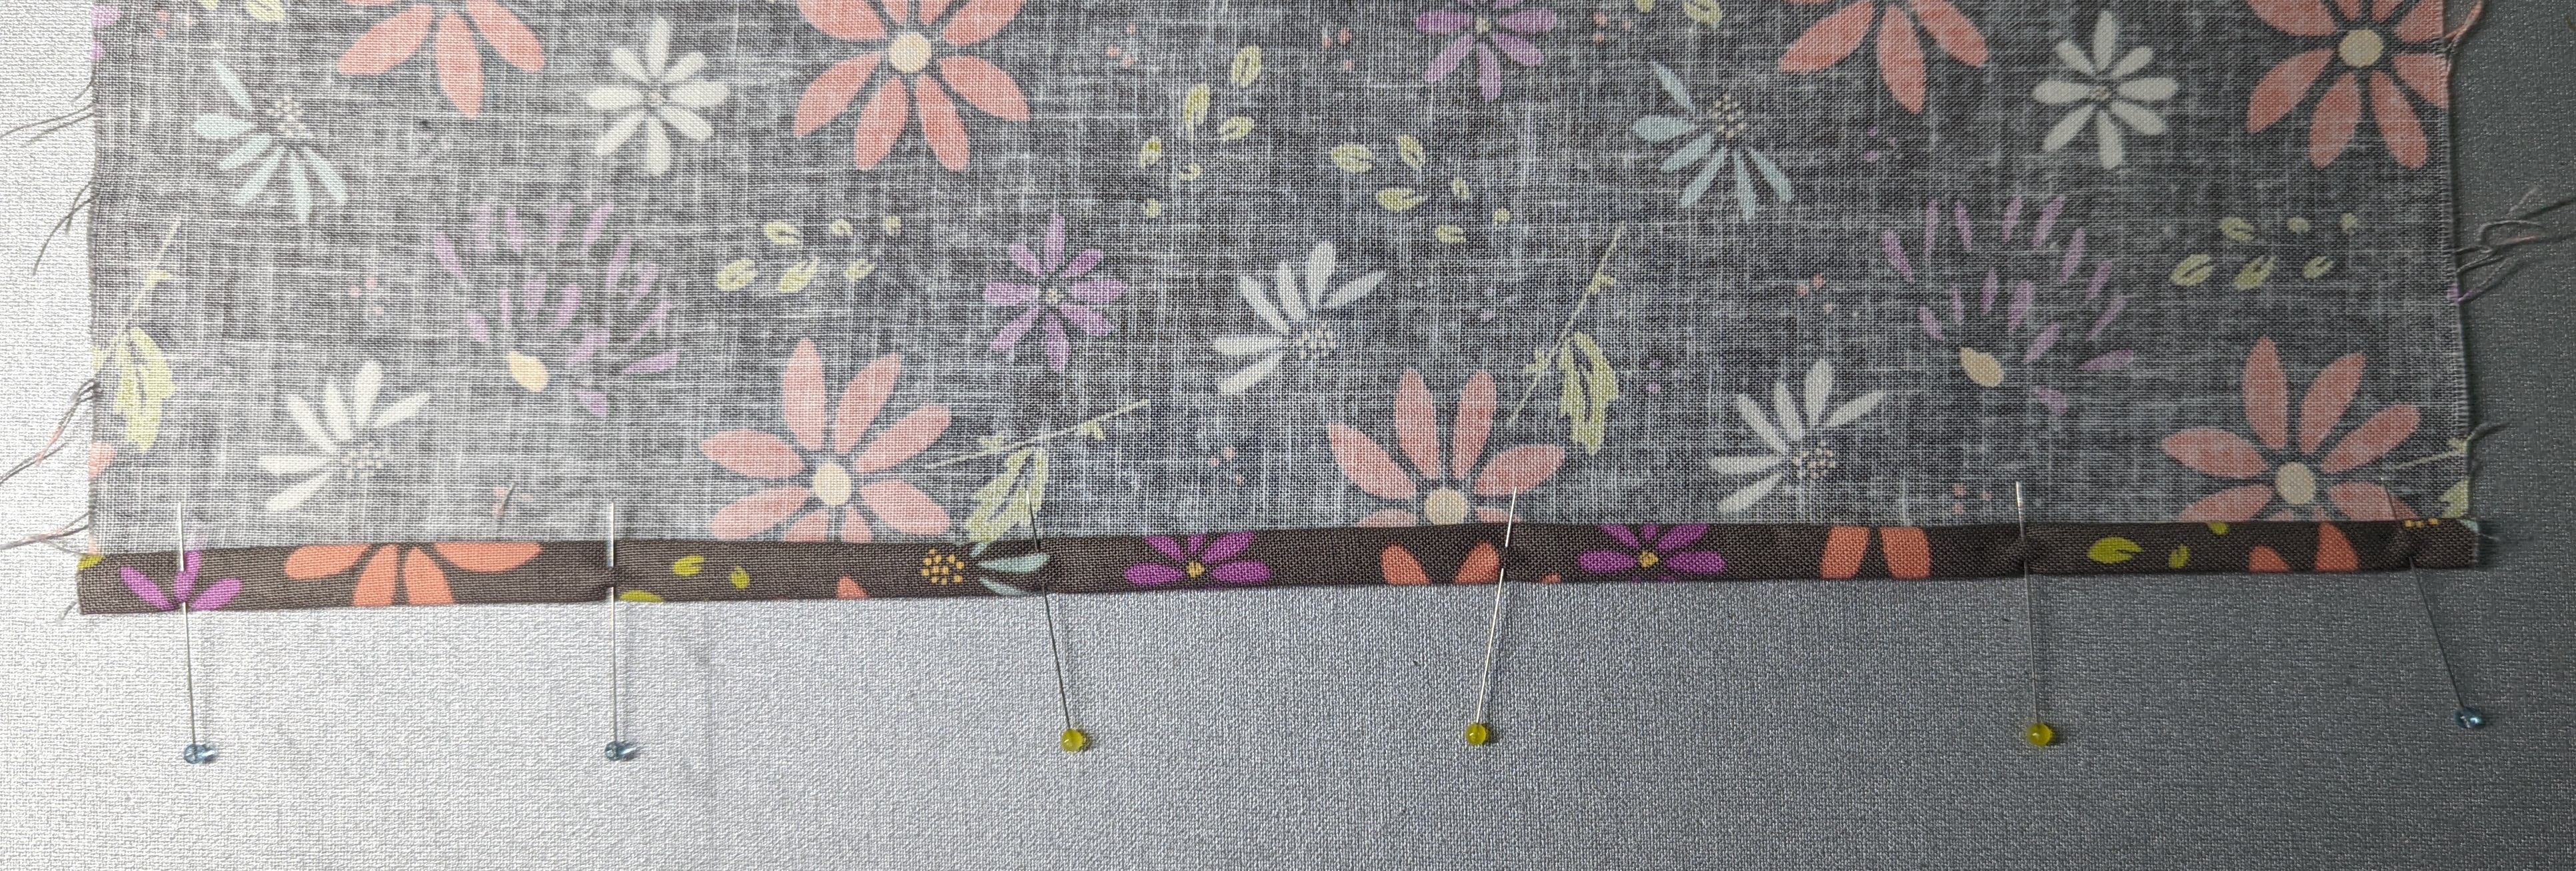
Step 2: On one 12 ½" side of the backing, fold the raw
edge of the fabric up to the 1/2" line and press. Move the ruler to
finish the whole backing piece. Repeat for the second backing piece.
 |
Pressing 1/2"
|
Step 3:Open the pressed 1/2" hemline.
Step 4:Fold the raw edge to the
press line and fold up, this will enclose the raw edge of the backing on one
side. Repeat for the second backing piece.
 |
| Top stitch |
Step 6:Now, lay the pillow front
on your table right side up, and place one backing piece wrong side up on top
of the left side of the pillow front. Make sure to match raw edges
placing the hem in the middle of the pillow front. Pin in place.
Next, using the second backing piece, place it on the right side of the pillow
front wrong side up. Make sure to match raw edges placing the hem in the
middle of the pillow front. Pin in place. *Note: that the backing pieces
will overlap.
 |
| Backing Overlap |
Step 7:
Once
your backing is pinned in place, from the corner, measure in 3/4" and
place a dot, then measure out 5" from the dot in both directions and mark
a dot that is 1/4" from the raw edge. Now mark a slightly curved
line from dot to dot, do this in both directions. This line will not be
straight (This will help when turning the pillow right side out, there will be
no sharp points on the corners.)
Repeat
for all 4 corners.
Stitch all the way around the pillow with a
1/4" seam. When you reach the lines
that are drawn on the backing, stitch on the lines, backstitching at the
beginning and end to reinforce the seam at that point.
Step 9:
Now, to reduce the bulk
in the corners of the pillow, follow the picture to trim the corners. A
combination of both trimming and grading the corners is needed to reduce bulk
and make the corners sharp and crisp when turned right side out and
pressed. Make sure not to trim too close to the corner stitching, if you
trim too close when turning, you run the risk of pushing a hole in the corners.
Trim all 4 corners.
 |
| Trimming Corners |
Step 10:
Turn the pillow right
side out, poking corners out. I use the OESD Expert Point & Press
Tool. There are two different sizes of round ends on this tool to use for
all kinds of turning. My tool is round because it was one of the first
made, they have now made them hexagon-shaped so that the tool will not roll off
your sewing table!!
 |
| OESD Perfect |
Step 11:
Stuff the pillow form
through the opening in the back of the pillow.
*You can make your own pillow form by using (2) 12 1/2" x 16 1/2"
muslin (or scrap) pieces. Sew together leaving a 4" hole on one
side. Turn the form right side out and stuff with poly fill or batting
scraps to the firmness of your liking. Hand sew the hole closed, then
place the form inside the pillow.
 |
| The pillow that started this obsession |
 |
Layout Option #1
Scraps from a quilt I made a giveaway! I might just have to give this pillow away as well. |
 |
Layout Option #1
Halloween version. |
I have two other pillows designed, so make sure to stop back by next week for another pattern.
Enjoy!
Keep on Stitchin'
Meg